Showing posts with label tripod. Show all posts

Monday, April 28, 2014

A Year Ago on Boost Your Photography

This was a great two weeks from last year: this iteration of A Year Ago on Boost Your Photography includes two of the top five articles of 2013. Enjoy!

2013:

Spinning Fire with Steel Wool Photography | Boost Your Photography

  • Spinning Fire with Steel Wool Photography. It's easy to capture amazing photographs with steel wool spinning. This article will walk you through all that you need to do to creative these types of photographs safely and easily (even with a point-and-shoot camera)!
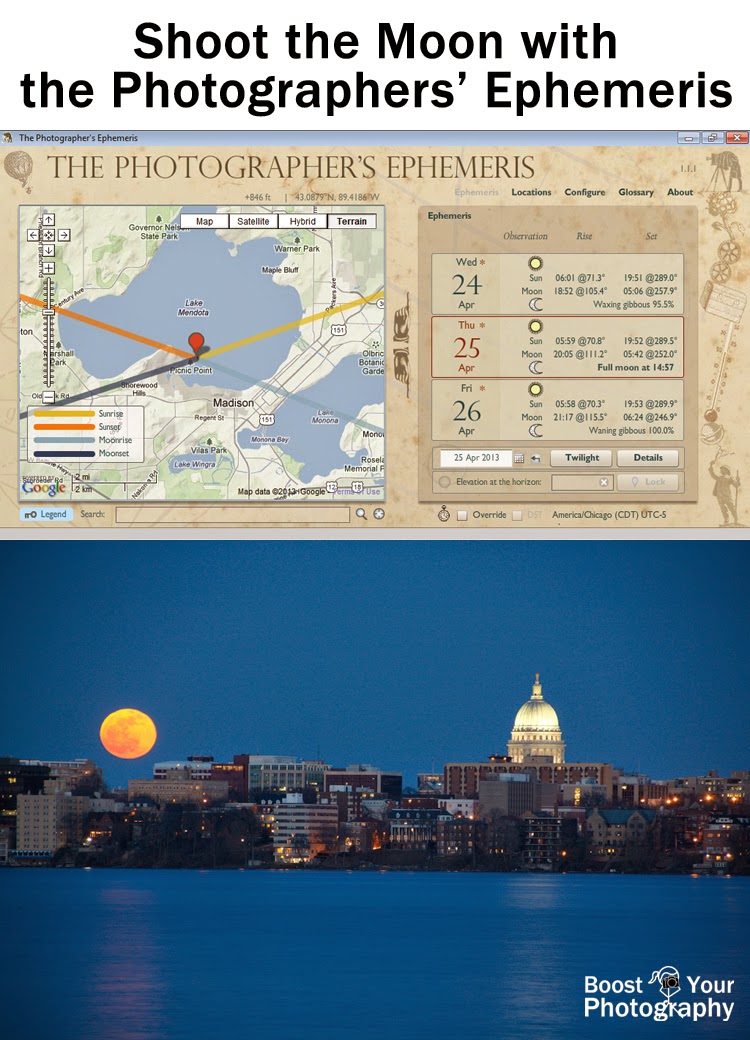
Shoot the Moon with the Photographer's Ephemeris | Boost Your Photography

Cheap and Easy Macro: Comparisons and Recommendations | Boost Your Photography

  • Cheap and Easy Macro: Comparisons and Recommendations. This summary article provides a quick overview of the most common, inexpensive ways to capture macro photographs, along with links to all the detailed articles about each method. The final head-to-head comparison will help you decide which method(s) may work best for you.

Don't Miss a Single Post from Boost Your Photography

Follow along on Facebook

Follow along on Google+

Follow along on Twitter

Follow along on Pinterest

Follow along on Bloglovin'

Or, better yet, receive updates daily or weekly via email. Sign up below!

Subscribe to our mailing list

* indicates required


How would you like to receive updates? *


Wednesday, April 16, 2014

Capture a Day in a Single Image

Looking for an incredible way to capture a favorite location or view? What about putting together a collage of all the changes in light and weather across a single day? This post will explore how best to go about creating a memorable single-day image like the one below.

(An aside: if you missed them, you can check out my shots from this week's eclipse on Facebook: https://www.facebook.com/BoostYourPhotography .)
Photograph a Day in a Single Image | Boost Your Photography
Image available for purchase.

Preparing for the Day

The first step is to choose an appropriate composition. Think about a location that will be impacted by both the rising and setting sun and one that will highlight the various transitions of the sun and sky throughout the day. You also want to choose a location that is easily accessible for you. The more times that you can visit and photograph the location through the day, the more options (and more potential slices) you will have to choose from.

As far as equipment, I strongly recommend using a tripod for these type of shots. A tripod will allow you to set up in approximately the same location and height each time, which will make it significantly easier to create the final merged image. (Read here How to Maximize Your Tripod.)

When I shot the series of photographs for the cityscape, above, I used the "high-tech" method of laying down a series of 'x marks the spot' sticks at the exact location of each leg of my tripod. Since I was shooting in a city park, this seemed like an easy and unobtrusive way of knowing exactly where to put my tripod each time I came back to shoot during the day.


Don't have a tripod? Just mark where you stood and then shoot from eye level. The series of three shots above were done free-hand using my point-and-shoot camera.

How to Photograph a Series of Day Shots

Once you have your location chosen, you will want to stake out a good day to take the photographs. Watch the weather, and find a day that will fit well with your schedule. Days with some cloud cover are ideal, as clouds add an extra dynamic to landscape shots. You want to arrive on location and set up before or during sunrise to get the earliest shots for your series. Consider using a program like The Photographer's Ephemeris to plot out exact sunrise and sunset times and locations.

The settings you use will ultimately depend on your scene and situation. I knew that with these landscape-style shots I wanted to maximize the depth of field. Because I was using a tripod for all shots, it also did not matter how long the shutter speed needed to be. So, I chose to shoot the majority of these shots in Aperture Priority Mode (A or Av) at f/22 and ISO 100. I also shot using Exposure Compensation and bracketing at plus-and-minus one stop in order to get a range of lighter and darker versions of each composition. (Questions about any of those settings? Read more about Aperture and the F/Stop Conundrum or All about Exposure or Troubleshooting Your Exposure.) The forest series was shot with my point-and-shoot using Program mode at ISO 100 and letting the camera choose the settings.

As mentioned already, I used a series of sticks to mark out the exact location of my tripod, so that I could be sure of shooting the same composition each time. After shooting the wide view of the scene (as used for the opening image), I also zoomed in and shot a 9-shot panorama version of the scene, to capture greater detail and record more pixels for potential larger prints.


Return as many times as possible during the day to photograph your scene. As it gets towards evening, plan on staying around and capturing the sunset, twilight, and evening shots all together. There is only about twenty minutes of elapsed time between the last two shots of my cityscape, for example. (Switch to Tungsten white balance for your deep evening shots to really accentuate the blues.)

Post-Processing: Creating the Collage

The final step is choosing your series of favorite shots and assembling the collage. The instructions below rely on Adobe Photoshop, but other collage programs or apps could also work.

First, select the entire series of photographs that you are planning to use, and copy and paste them into the same file. Then, select all of the photographs and choose the Edit -> Auto Align Layers option. I use the Auto setting. This will align all of the photographs together, eliminating any differences from your aim, composition, etc.

Auto-Aligning Layers in Photoshop | Boost Your Photography
Auto-Aligning the Layers will leave gaps along the edges where individual images do not overlap.

Use the crop tool to create your final composition. (Generally, aligning the layers will mean that there are now some gaps along the edges of certain images.) Think about the aspect ratio of your final shot before you crop: do you want to keep it as a 4x6 or an 8x10 or widescreen? (Read more about Aspect Ratio: Know Before You Crop.) For the version shown, I cropped to a 2:3 aspect ratio (4x6) but also did another version with a widescreen (1:2.35) aspect ratio.

Now you need to decide which portion of which picture to use as part of the final composition. Use guides to divide your composition into equal slices (or not, if you prefer). Then, click to select the top-most layer. Go to Layer -> Layer Mask -> Reveal All. This will add an all-white layer mask next to this layer. Now, use the select tool to select the sections of this image that you do not want to show.

The selected portion of the image will have a black layer mask added to hide it from view.

Click to select the layer mask, and then use the paint bucket tool to paint the selection black. This will hide that portion of the image from view. Repeat this process of adding a layer mask and selecting only the desired section of each of the images. Then you will have your final image - a collage across the day including a slice for each photograph!

Final composition showing Layers Palette with black and white layer masks.

There you have it!  What will you photograph and create?  Share a link in the comments below!

Want more great ideas? Follow Boost Your Photography on Pinterest: Boost Your Photography

Wednesday, April 9, 2014

GorillaPod Tripod Review

A recent re-posting of my earlier tripod article, Maximize Your Tripod, generated a lot of interest from readers who were not familiar with the GorillaPod line of flexible travel tripods. To that end, I thought it might be useful to provide a more in-depth review of the GorillaPod and some of the common scenarios for which it can prove quite useful.

GorillaPod Tripod Review | Boost Your Photography

What is a GorillaPod?

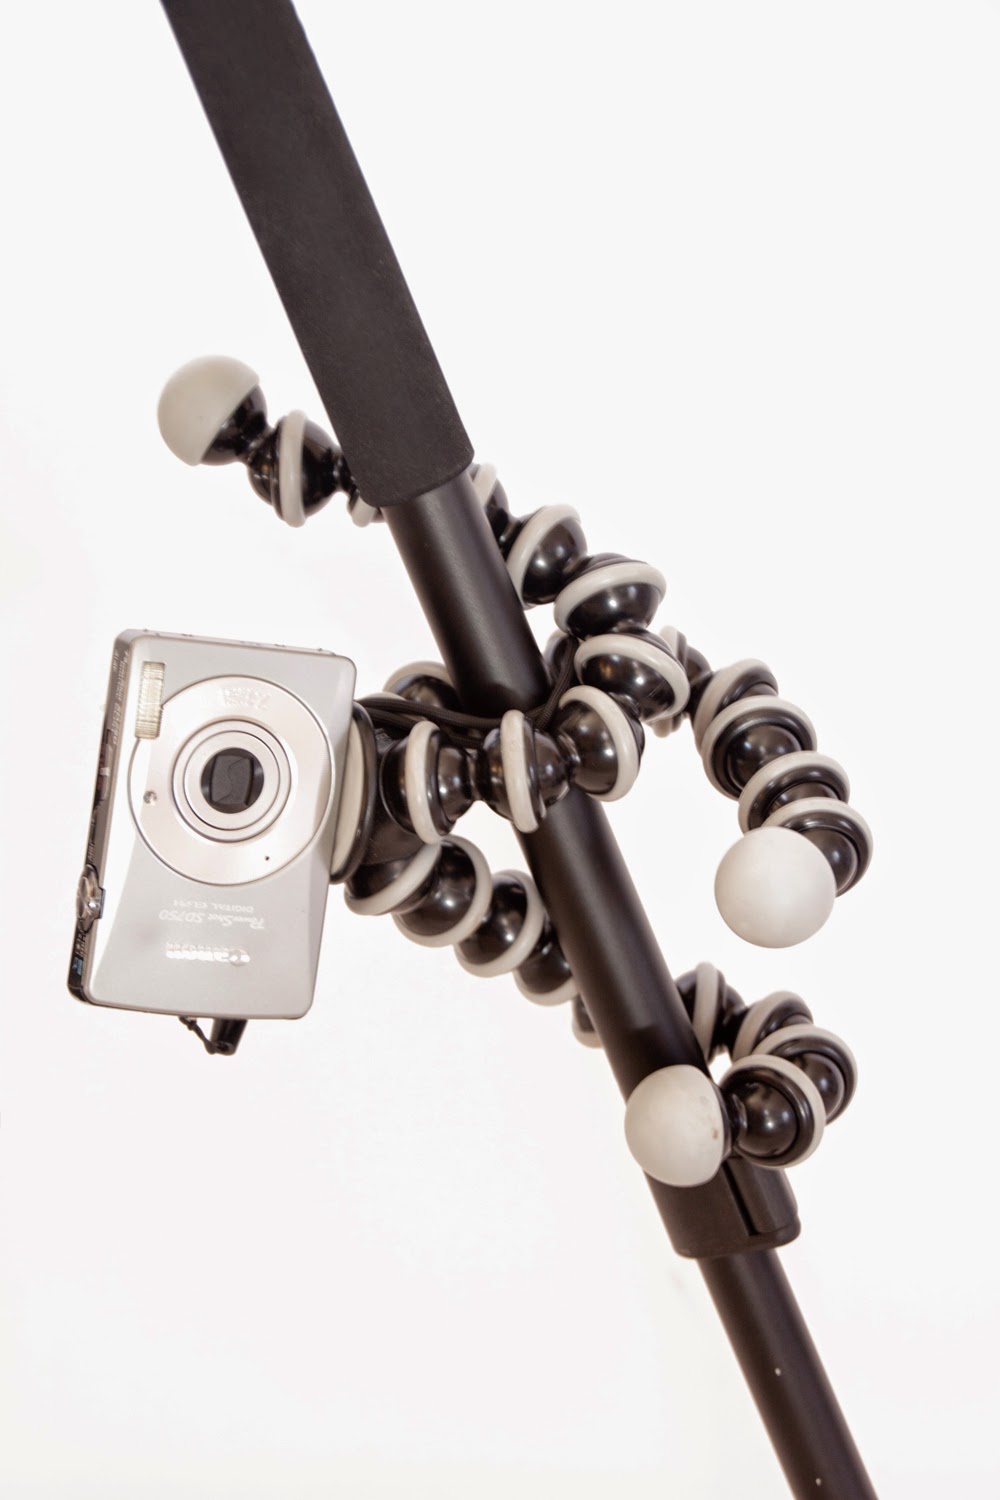
The GorillaPod is a line of tripods made by Joby that are constructed with flexible legs of multiple ball-shaped units that can be moved and manipulated in a variety of ways. There are several different varieties, so you want to be sure that you purchase one rated for your particular camera.

Joby GorillaPod GP3 Tripod Review | Boost Your Photography

The Joby GorillaPod original comes in several different colors and is rated for point-and-shoot cameras. The Joby GorillaPod grip tight has an adjustable grip stand to hold cell phones. The Joby GP3 GorillaPod is rated for DSLR cameras and is also available in a GP3 version with adjustable ball head. I have the basic version, which is what you will see pictured in the setup photographs, but I am strongly considering purchasing the adjustable ball head as an add-on (but more on why later). The heavier and bulkier Joby GP3 GorillaPod can also be used with point-and-shoot cameras, but I would not risk using a heavy DSLR camera on the lighter original version.

Portability and Ease of Use

The GorillaPod is very portable and easy to use. You simply screw the tripod into the tripod mount at the bottom of your camera. I find it easiest to hold my camera tightly upside-down and quickly rotate the GorillaPod around until it tightens. Because I generally wear my camera slung over one shoulder, I often leave the GorillaPod attached when moving from shot to shot, and it just hangs down underneath the camera. When not attached, even the larger Joby GP3 (at less than 10 inches long) fits easily into even a mid-range sized purse. (Add 2-3 inches for the version with the ball head.)

GorillaPod Tripod Review | Boost Your Photography

The legs are very easy to bend and manipulate, but at the same time, I have found that they are also quite solid and stable once you have finished adjusting them. You can pull the three legs apart and use the GorillaPod like a traditional tripod. You can use them to bend and wrap around something to hold the camera up or even suspended. You can even bend them down to nearly flat and allow you to aim and position your camera from down near ground level.

Compare GorillaPod and Full-Size Tripod | Boost Your Photography

The ability to set up your camera down near ground level is one of the most useful features of the GorillaPod. With a standard tripod, you are often limited in how low you can set up, as most heavy-duty full-scale tripods have a center pole that limits the minimum height of the tripod. The GorillaPod allows you to keep your camera close to the ground but also gives you the precision to adjust your aim and angle, which you don't have if you simply place your camera on the ground. This low viewpoint can give your photographs a unique perspective.

Joby GorilladPod Tripod Review | Boost Your Photography

My main complaint with my current GorillaPod, the Joby GP3, is that it is difficult to make minor adjustments to the position of the camera, such as those required to keep the camera perfectly level. Crooked horizons can frustrate any photographer, and they can be a particular problem with the GorillaPod (especially if you are shooting low at ground level and don't want to have to lie on your side to see through your viewfinder). This is where the adjustable ball head with level would come in extremely handy, as it would give you more minute precision and allow you to easily see whether your camera was aimed level.

GorillaPod Example Shots


These two photographs were taken from the same location, but the top version was shot from the minimum height of my full-scale tripod, and the bottom version was shot using the GorillaPod near ground level. I really like the wide-angle feel that the GorillaPod shot gives with the inclusion of the decking and the added context to the shot.

Motion Blur Merry-Go-Round Selfie Taken with GorillaPod | Boost Your Photography

This is my all-time favorite scenario for a GorillaPod and one of my all-time favorite selfies (it's even featured on my About page). Here, I used my GorillaPod to secure my camera onto the far pole of the merry-go-round. Then, I set the camera for a 10-second timer delay and had it shoot a series of six photographs at a time. All I had to do were choose my settings, set the focus, hit the shutter button, and start running!  Once I mentally had counted down to about 8, I jumped onto the merry-go-round and tried to keep smiling until the camera was done shooting the whole series.

GorillaPod Merry-Go-Round Setup | Boost Your Photography

Joby GorillaPod Conclusion

Overall, I strongly recommend the Joby line of GorillaPods. They are a fantastic option for a travel tripod, as even the heavy-duty versions are fairly small and portable, especially when compared to a full-scale tripod, and you can easily fit one in a purse, backpack, or camera case. If you have been looking for a tripod and are not sure that you want to make the jump to a full-size one, the GorillaPod is a great option. The flexible nature allows you to use it in a variety of common (and uncommon) situations, and it can really make a strong impact on your photography.


Boost Your Photography: Learn Your DSLR is now available from Amazon. Get the most out of your camera with practical advice about the technical and creative aspects of DSLR photography that will have you taking beautiful pictures right away.

Wednesday, February 19, 2014

Foldable DIY Photography Light Tent

A light tent is an extremely useful tool in photography, particularly for product shots, close-ups, and any time you want a consistent white (or even colored) backdrop and even lighting. This article will explain the simple steps behind creating your own DIY Photography Light Tent, and, as a bonus, this version will fold flat for easy storage.

Foldable DIY Photography Light Tent | Boost Your Photography

Supplies for Your DIY Light Tent

You only need a few basic supplies for building your own light tent, and you may already have them all in your house. The most important thing you will need is a sturdy cardboard box, at least 12 inches square but a bit larger will work even better. The one I used was a 10 x 12 x 18 inch shipping box, scavenged out of the recycling bin.

Foldable DIY Photography Light Tent - Supplies | Boost Your Photography

The rest of the supplies you need include tissue paper, a roll of shipping tape, scissors, and an x-acto or utility knife. A cutting board and clear ruler are also helpful. You can use duct tape, if you wish, but I prefer the clear shipping tape, as you do not have to worry about it blocking any of the light from your final product. After you have built your box, you will also need a sheet of bright white poster board (or any other colors you might want) to use for the backdrop.

Supply Summary:

  • Cardboard box, at least 12 inches square
  • Tissue paper (2-3 sheets, more for larger boxes)
  • Clear shipping tape
  • Scissors
  • X-acto or utility knife
  • Sheet of white poster board

Useful but not required:


Building the Light Tent

The whole process of constructing the light tent should take you under a half an hour from start to finish. (Mine took significantly longer since I kept stopping at every step to take these pictures. But even with that, I was done in less than an hour.)

Foldable DIY Photography Light Tent - Tape Edges | Boost Your Photography

The first step is choosing whether you want to use the flaps on the 'top' of the box to extend its depth. Since my box was only 10 inches deep, I chose to tape together the flaps on both the inside and outside, as shown. This gave me a final depth of 16 inches. If you are using a deeper box, you may choose to simply cut off the flaps.

Foldable DIY Photography Light Tent - Measure | Boost Your Photography

The next step is to determine which side will be the bottom of your light tent and then to measure in at least one inch from all edges for the remaining three sides of the box. (An inch will give enough room to hold the tape without any tape showing, but you may want to extend it to an inch and a half for increased stability.)

Foldable DIY Photography Light Tent - Cutting | Boost Your Photography

Use the x-acto or utility knife to cut out all three sides, being careful not to cut through to the other side of the box. I used a self-healing craft cutting mat at this step to protect the underside of the box and a clear ruler to guide the knife. You can discard the cutout pieces.

Foldable DIY Photography Light Tent - Cut out | Boost Your Photography

At this point, you can stand the box up and have a look at it. The original bottom of the box will now be the back of your light tent. Do not tape down the bottom/back just yet, if you want to be able to easily re-flatten your light tent for easy storage.

Foldable DIY Photography Light Tent - Clip | Boost Your Photography

One other feature I decided to add to my light tent was a slot for a binder clip. Use the x-acto or utility knife to cut two small slits out of the top of your light tent along the back side, one near each corner. This will allow you to clip the binder clip around the back of the light tent from the outside to the inside, as shown. You will then be able to use these clips to hold up your poster board backdrops with a minimum of fuss. (Confused? Keep reading; this will make more sense later when you can see them in action.)

Foldable DIY Photography Light Tent - Taping | Boost Your Photography

The next step is cutting and taping down the tissue paper. Cut the tissue paper about a half-inch shorter on all sides than the actual box. This will give you a gap of cardboard to attach the tape to, as well as room to wrap the tape around the sides. If you have not yet taped together the back of the light tent (formerly the bottom of the box), then you can wrap the tape around and inside the bottom flap only, as shown. This will allow you to flatten and fold-down the box later for easy storage.

Foldable DIY Photography Light Tent - Basics | Boost Your Photography

You should have tissue paper around the two sides and the top. At this point you can lightly tape down the back of the light tent. (I recommend using a big piece of tape inside to hold it too.) Congratulations!  You have just created your own Foldable DIY Light Tent!

Foldable DIY Photography Light Tent - Completed | Boost Your Photography

The last step is to create the background for your seamless backdrop. Take a piece of white poster board and cut it to the final width of your box. Slide it up inside to the top, and use the two binder clips to hold it securely to the box. (See how handy those were?) Push the poster board in until you have a smooth, even curve along the back, and avoid bending or folding it in any way. You can either trim the board at this point to match your box size (and attach at the bottom using two more binder clips), or you can leave it extending from the box. As shown, I chose to leave mine extending out, which will give a little more of the white foreground to work with.

Foldable DIY Photography Light Tent - Folded | Boost Your Photography

When you are finished using the light tent, all you need to do is gently slice through the tape holding the back of the box together, and then open the back flaps and lay the box closed as shown. The tape will be flexible enough to allow itself to be folded. Now you can easily store it somewhere out of the way, like under a bed or behind a book case.

Lighting Your Light Tent

You can use your light tent in daylight to diffuse incoming sunlight and eliminate harsh shadows. Simply place your light tent in a well-lit spot near a window, with the back of the tent toward the window and with both sides evenly lit.

Foldable DIY Photography Light Tent - Window Lighting | Boost Your Photography

Depending on the angle that you want, you can rest your camera directly on the table top or use a tripod to hold it steady. This arrangement will allow you to capture evenly-lit shots, and the light through the top panel can even create an interesting reflection, if you are using shiny poster board.

Foldable DIY Photography Light Tent - Nail Polish | Boost Your Photography
Nail polish photographed using the set up above exactly as shown.

The alternative way to light your light tent is to use two lamps, one on each side of the box, which will balance each other out and create even lighting.

Foldable DIY Photography Light Tent - Set up | Boost Your Photography

Pay attention to the style of light bulb you are using, as many bulbs are designed to impart a "warm glow" to our interior lighting, but this warm glow can translate into a yellow-ish hue in your shots (as seen above). Read the packaging of your light bulbs carefully, and you should be able to find the color temperature (in K for Kelvins) of the light. You can set the white balance on your camera to try and match the temperature of the lights, if known. (For example, the daylight white balance setting matches 5400K, fluorescent matches 3800K, etc.) If you shoot in RAW, you can adjust your white balance in post-processing.

Foldable DIY Photography Light Tent - Light Bulbs | Boost Your Photography
Example of the same shot, adjusting the white balance from the RAW file.
Originally shot using compact fluorescent bulbs.

DIY Light Tent Summary

A light tent is an incredible useful tool for taking high quality photographs of smaller items and objects. It is particularly useful if you want crisp shots of products for sale and for instructional photographs on a blog or web site. If you want your creations to look their best, then use a light box.

This post has covered the basics for creating your own foldable light tent out of everyday materials. The next posts in this series will cover How to Use a Light Tent for Product Photography (more detailed advice and how to), a Face-Off: DIY Light Tent vs. Store-Bought, and a product review of the Square Perfect SP500 Platinum Light Tent Kit.

Have you built your own light tent? Post a picture or comment below and share your results!

Want more great ideas? Follow Boost Your Photography on Pinterest: Boost Your Photography

Not sure you want to go the DIY route? Read the Product Review of the Square Perfect Light Tent for a kit option.


Don't miss a post: subscribe to our mailing list

* indicates required


How would you like to receive updates? *


Boost Your Photography: Learn Your DSLR is now available from Amazon. Get the most out of your camera with practical advice about the technical and creative aspects of DSLR photography that will have you taking beautiful pictures right away.

Saturday, December 28, 2013

Must Have Accessories for Your (New) Camera

Must Have Accessories for Your (New) DSLR Camera | Boost Your Photography

There is more to purchasing a new camera than just deciding about the body and lens(es). Once you have made that big decision, there are some follow-up accessory purchases that you should make. This post will provide a quick overview of the most common 'must have' accessories for your new camera.

UV Filter

A UV filter is a screw-on filter that protects both your lens and your camera body. It is easily cleaned and helps protect your lens from dirt and dust. A UV filter also cuts down on the impact of UV rays on your camera and sensor. When purchasing a UV filter, you need to know the diameter of your lens (indicated with the Ø symbol). Recommended brands for filters include B+W and Hoya. Read more about the importance of UV filters in this post on Lens Accessories.

Spare Battery


You should always have at least one spare battery on hand. That way, you do not have to worry about how many shots are left on your current battery. That way, when one battery gets low, you can immediately replace it with a fresh battery. Off-brand batteries are often available that match the battery that came with your camera: just do a search for the battery name. I use both Promaster and Sterlingtek batteries with my Canon. Read more about batteries in How Long Does Your Camera Battery Last?

Extra Memory Card

Along with a spare battery, you should also have an extra memory card on hand. Memory cards continue to fall in price and are often heavily discounted around the holidays. You can also purchase a small, waterproof and weather-sealed case to hold your spare cards. Read more in Travel Photography Must Haves.

Lens Cap Holder

Lens caps are small, fiddly, and often misplaced. These simple holders attach via adhesive to your lens cap and then you can wrap the band around your wrist or lens. A quick and easy way to keep track of your lens cap.

LensPen

You want to be sure to keep your new camera clean. A LensPen is a handy double-sided cleaning tool for your camera lens. One end has a retractable brush for brushing away dust and particles, while the other end has and a flattened tip with a carbon cleaning compound. Use small circular motions to wipe away grime and fingerprints. The LensPen is so-called for its pen shape, which makes it easy to transport and keep one on hand when you go out shooting. Read more in Keeping Your Camera and Sensor Clean.

Camera Case

A camera case is an important, and often overlooked, camera accessory. There are two primary purposes for camera bags (carrying your camera and supplies when shooting and for holding your camera, lenses, and supplies at home), and you may want to consider different bags for both.


Think about the types of shooting that you do before purchasing a bag. For those who do a lot of street photography or want to remain inconspicuous, the Crumpler brand of camera bags are very popular, including the Crumpler 5 Million Dollar Bag, shown above. Backpack-style bags are popular with those who do a lot of traveling or like to change lenses often. Personally, unless I am traveling extensively, I keep my camera out when shooting and use my regular purse to carry accessories, filters, and my remote.

For home use, you also want to have a dedicated area or bag(s) for storing your camera, lenses, and other supplies. Keeping your photography equipment clean and organized will make it easier for you to use and access it whenever you need it. Since I know that I will not be traveling with this bag, I just use the inexpensive, not well-padded bulky bag that came with in the 'kit' with my DSLR camera and lenses. For traveling, I have a more compact, padded bag with a built-in waterproof cover: the Lowe Pro Nova.

Camera Wrap

Another often-overlooked camera accessory is a camera wrap. Rather than a case, a wrap is simply a neoprene sleeve for your camera. This is useful for times when you are traveling with your camera and not with a dedicated case. I often use my camera wrap to hold my camera in my purse when I am out traveling with my camera but not shooting at the time.

Remote Shutter Release

A remote shutter release allows you to operate your camera remotely – whether you are using a corded remote plugged into your camera or a wireless version. A remote is useful for keeping your camera stable when shooting with a tripod, triggering shots when you want to include yourself in the picture, and shooting pictures with a shutter speed longer than 30 seconds (using the Bulb setting). Read more in Easy Photography Upgrade: Get a Remote Shutter Release.

Tripod

A tripod is a useful photography tool, and tripods come in many varieties and styles. You may want to consider buying two different tripods: a small travel tripod, like a GorillaPod, and a full-size tripod for more serious use.

A GorillaPod is a small, flexible tripod. You can use it like a traditional tripod, or you can manipulate the legs to wrap around something and hold up your camera. You can also buy a ball-head with level attachment. The ball-head is extremely useful, as it allows you to easily level your camera without re-adjusting the legs. If you purchase a GorillaPod, you want to buy the correct version for your size of camera, as there is a smaller, thinner version for point-and-shoot cameras and a larger, chunkier version for DSLRs.

If you are serious about wanting to use a tripod, then you will want to buy a full-size version as well. There are many varieties of full-size tripods, so you will need to decide which features are important for you. Pricier versions are often lighter or more compact. Many brands, like Vanguard, will come with a lifetime warranty. Take this into account when purchasing a tripod, as a larger investment now may be one that you do not need to ever make again. (I recently had an adjustment button on my Vanguard Alta break during rough transport, and my local camera store was able to ship it off and get it replaced for free within only two weeks. While it was tough to be without my tripod for those weeks, but it was well worth not having to buy a new one!)

Read more about How to Maximize Your Tripod.

Summary: Camera Accessories

There are many things to consider with your new camera, and this post has served just to highlight some of the most common and most useful ones. If you are just starting out, be sure to purchase, at minimum, a UV filter, an extra battery, a spare memory card, and a LensPen or other cleaning supplies. Then, as you can, think about adding a lens cap holder, a camera case and/or wrap, a remote shutter release, and a tripod and/or GorillaPod. You will find these invaluable as you continue on your photographic journey.


Boost Your Photography: Learn Your DSLR is now available from Amazon. Get the most out of your camera with practical advice about the technical and creative aspects of DSLR photography that will have you taking beautiful pictures right away.