Saturday, March 28, 2015

Theme and Photography

As we reach the home stretch for the 2014 version of Boost Your Photography: 52 Weeks Challenge , our topics have grown from technical to the more abstract. Our final topic for the month of March is the idea of theme. (Interested in joining the 52 Weeks Challenge? We are also starting a re-boot version kicking off from the beginning: click here to join in for 2015!)

Theme and Photography

Many photographers, especially those of us who consider ourselves hobbyists, often focus on the what of photography. "What do you shoot?" "Oh, I shoot portraits" or "Oh, I shoot travel photography."

But how often do we stop and think more about the why of what we shoot or the what we want to convey? The idea behind the theme challenge this week is to focus first on the theme or the meaning or the idea and only then to seek out an appropriate subject to convey that theme.

Freeman Patterson describes this process in his book, Photography and the Art of Seeing, which was the subject of a month-long book club a year ago August. Patterson encourages photographers to go through a three step creative process: "First, you conceive or imagine a theme. Second, you find (that is, perceive) subject matter that expresses that theme or concept. Third, you conceive the best way to organize the subject matter and use your photographic tools" (pg. 56). This process of "abstracting and selecting help to make clear expression possible" (pg. 60).

Expressing 'calm' for a photography scavenger hunt.
Try this three-step process this week. For example, start by selecting an abstract subject (his example is 'tranquility'), and then ask yourself what subject matter best expresses this subject and why. Or, think about what tones or combination of tones would express that idea. Try to seek out and take photographs of that subject matter and/or those tones to express that subject.

Expressing 'chaos' for a photography scavenger hunt.
The two example photographs provided above were part of a photography scavenger hunt organized by our local photography Meetup group. We were given a list of a dozen abstract nouns and tasked with finding and photographing our best representation of those words.

Choose your theme for the week or give yourself a list of terms. See what you can create when you start from the theme, the meaning, or the emotion, rather than from your subject.

Share a link or a photograph in the comments below, or consider joining the BYP 52 Weeks Google+ Community (or the new 52 Weeks 2015) to share your weekly photograph and see what others are capturing.

Want to learn more about Freeman Patterson or Photography and the Art of Seeing? You can read the rest of the August Photography Book Club posts here: overviewweek 1reflection on week 1week 2 (contains the mundane exercises), week 3, and week 4.


Boost Your Photography: Learn Your DSLR is now available from Amazon. Get the most out of your camera with practical advice about the technical and creative aspects of DSLR photography that will have you taking beautiful pictures right away.

Tuesday, March 24, 2015

The Decisive Moment - for more than just street photography

Henri Cartier-Bresson was a famous photographer, best known for his black and white documentary and street photography images. He coined the term The Decisive Moment in his book of the same name, drawing a distinction between an art like painting, where an image is created over a long period of time, and photography, where mere fractions of seconds determine the final outcome.

The idea behind the decisive moment is most closely associated with street photography, due to its unposed and unpredictable nature. Whereas modern photographers with fast burst rates have the option to "spray and pray" (shoot off a rapid series of images and later select the best one), film photographers had to be more selective. The decisive moment was all about choosing exactly when to take the photograph and hoping to strike the exact right balance between all the elements in the final image.

Patience and the Decisive Moment

For the digital photographer, the ideas behind the decisive moment are all about planning and patience. Great photographs are not accidents. They are the result of a collection of right decisions about framing, composition, subject, and settings, among others (as well as a hearty dose of luck at times too).

Consider becoming a more patient photographer, if you want to chase the decisive moment. Street photographers often talk about finding a great background or interesting scene and then waiting for the right person to walk by and 'make' the shot. Snapping a few quick images and moving on to the next thing will not give you that same quality.


The photograph above was taken as part of a week-long street photography challenge that I undertook. I was drawn to the repetition of the lines and shadows of this building, but I knew that I needed a person to really complete the image that I had in mind. So, I waited.


One of my earlier attempts was not quite right. I liked the aesthetic of the lone walker, but his symmetrical placement in the middle did not give the feeling of motion and balance that I wanted. After several more attempts, I came away with the image below - the young woman's sense of purpose is conveyed well by her stride, and her position a third of the way into the frame gives her room to move through the picture as well.

The Decisive Moment - beyond street photography

The ideas behind capturing the decisive moment extends well behind just street photography and portraiture. Landscape, nature, and travel photography also lend themselves well to a consideration of the decisive moment.

The rapid movement of birds or other animals requires a quick shot and a sense of timing. The constantly-changing light of a sunrise or sunset demands an eye for detail and patience to wait out the best moment. Rather than shooting a rapid burst of shots and hoping for the best, plan, anticipate, and photograph only the moment you truly want.


10 minutes later ...


5 minutes later ...


How will you find your decisive moment?

Share a link or a photograph in the comments below, or consider joining the BYP 52 Weeks Google+ Community (or the new 52 Weeks 2015) to share your weekly photograph and see what others are capturing.


Boost Your Photography: Learn Your DSLR is now available from Amazon. Get the most out of your camera with practical advice about the technical and creative aspects of DSLR photography that will have you taking beautiful pictures right away.

Wednesday, March 11, 2015

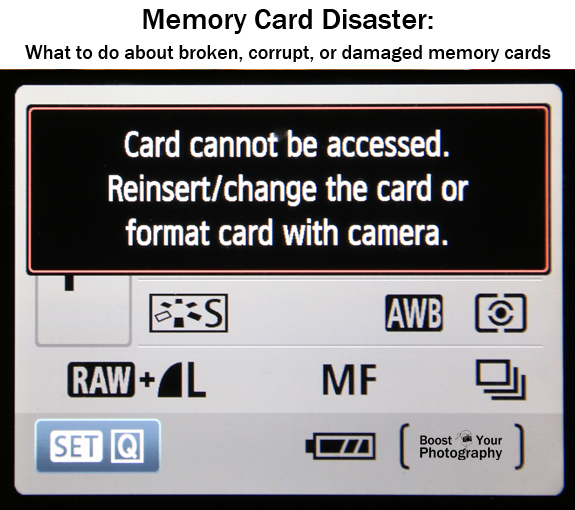
Memory Card Disaster: what to do about broken, corrupt, or damaged memory cards

Memory cards are fallible, and, like it or not, some times memory card disaster strikes! The first post in this series introduced tips for how to Avoid Memory Card Disaster. This post will walk you through what to do if your memory card fails.


Memory Cards and Human Error

Briefly I wanted to address a few memory card mistakes that are caused by operator error, as in what to do if you accidentally deleted files from your memory card or if you accidentally reformatted a memory card before backing up the files.

Do not take any more pictures with that memory card.

If you have accidentally deleted files or reformatted and lost files, you do not want to take any further actions with that card. Deleted or reformatted files can often be recovered, but if you start saving new files, those files can "save over" the originals, rendering them lost forever. (My sister lost several hours of wedding photographs when her photographer mistakenly reformatted and then reused one of the memory cards from her wedding before downloading those files to her computer. Yikes.)

If you realize that you have deleted files you still want, it is likely that you will be able to recover those files using a data recovery software program. Scroll down to the data recovery section to read more.

Corrupt Memory Cards

A corrupt memory card is one that can still be read by your camera or computer but is either missing files or returning an error message. There are several thing different things that can cause a memory card to become corrupt. (Avoid doing any of the following actions.)


  • Deleting files manually or using a computer (rather than reformatting in camera) can clog up a memory card 
  • Magnets and static electricity (sparks or shocks) can mess up the electrical inner workings of your memory card
  • Removing your memory card while your camera is trying to write information to that card can cause it to become corrupt
  • If your battery dies while your camera is in the middle of writing information to your memory card, it can cause your card to become corrupt or damaged.

If your computer will recognize your memory card when you plug it in (either directly or with a memory card reader), then you can attempt to run data recovery software on your card.

Data Recovery Software

There are many different data recovery software programs available, all of which claim to be able to resurrect your deleted photographs from accidental deletion or a corrupt memory card.

Some highly recommended programs are available free online, including PhotoRec and Recuva from PiriformPhotoRec is a completely free, open-source software program. Recuva has two different versions: a fully functional free version and a professional version that offers tech support and upgrades (currently $25 USD).

SanDisk has its own software called Rescue Pro and Rescue Pro Deluxe (click here for the PC version, and click here for the Mac version). One of the benefits of this program is that there is a free trial version you can run to let you see whether your files are recoverable. Only after you know that the program will work do you have to pay for it (currently $40 USD standard or $60 deluxe for a year's subscription). You can read a fuller description (with screen shots) of how the software works in the article How to Recover Lost Files from a Memory Card.

But alas, there are still some memory card problems that cannot be overcome by photo recovery software. This last section will explore your options for what to do when data recovery software fails to solve your problem.

Damaged or Otherwise Unreadable Memory Cards

Unreadable memory cards are a significantly bigger problem than a corrupt card. If your camera and computer stop recognizing your memory card, then you will be unable to run any of the recovery software programs mentioned above. The only solution for an unreadable memory card is to send it off to a data recovery specialist who will physically disassemble your card and try to access the memory stored within it.


The problem with this solution is that it is a very labor intensive, and therefore expensive, proposition. There are many different companies available that offer these services, or you can ask your local camera company for recommendations. The manufacturer of your memory card may also make recommendations. SanDisk, for example, refers users to LC Technology, whose prices start around $150 and quickly escalate. The local company recommended by my camera store started around $250 for data recovery from a flash drive.

Read the fine print. Some companies will only charge you if they are successful at retrieving your date files, while others will charge you regardless. I highly recommend choosing a company that will not charge you if the process does not work, otherwise you could be out hundreds of dollars and still not get your digital files recovered.

Summary: Troubleshooting Memory Card Problems

There are many actions that can cause problems with your memory cards. Eventually, like most technology these days, they may just wear out. Avoid memory card disaster by caring for them safely and by consistently backing up your photographs using multiple, redundant methods.

If you accidentally delete files or reformat, do not keep using that card, and run data recovery software on it as soon as possible. If your memory card becomes corrupt, try running data recovery software to see if your files are recoverable. If your memory card becomes unreadable and is not recognized by your camera or computer, then you have to decide whether those deleted photographs are worth paying an expert or specialist to disassemble your card.

Let us hope that you never need the advice within the post, but if you do, it is here as a resource to help you in hopefully successfully recovering your files.


Boost Your Photography: Learn Your DSLR is available from Amazon. Get the most out of your camera with practical advice about the technical and creative aspects of DSLR photography that will have you taking beautiful pictures right away.

Monday, March 9, 2015

A Year Ago on Boost Your Photography

2014:
  • The Winter Round-Up. This compilation post has links and overviews of all the amazing photography posts from the previous three months, all in one place.
  • Shutter Speed: an overview and visual reference: this popular post about shutter speed provides an overview of the various shutter speeds, as well as recommended situations for each. This advice is then collected in one easy-to-understand visual reference chart. A great place to start for understanding shutter speed!
  • Tips to Improve Your Macro Photography: Last year we focused on "Macro March," and this post full of tips kicked off the month. Learn quick, practical advice for improving your macro and close-up photography shots.

  • Focus Stacking for Macro Photography: Focus stacking is an innovative post-processing technique for combining a series of macro or close-up photographs into one image with a much greater depth of field. This post will walk you through the basics to create incredible focus-stacked images.

Don't Miss a Single Post from Boost Your Photography

Follow along on Facebook

Follow along on Google+

Follow along on Twitter

Follow along on Pinterest

Follow along on Bloglovin'

Or, better yet, receive updates daily or weekly via email. Sign up below!

Subscribe to our mailing list

* indicates required


How would you like to receive updates? *


Saturday, March 7, 2015

Photography Inspiration: explore the mundane

Photographic inspiration is all around us, but many of us instead leave our cameras packed away as we pine for big travel plans and exotic locales. You can learn a lot about yourself and your photography if you spend some time photographing the mundane.

Exploring the Mundane in Your Photography

Photography is about seeing, both literally and figuratively. Spending some time trying to photograph a mundane subject or object is a great way to stretch yourself as a photographer and to force yourself to "see" that object differently.

Freeman Patterson in his Photography and the Art of Seeing described the problem of labels and how we often (unintentionally) limit our own photography: "We look at a cup and what we see is 'cup-ness,' not the flaring rim, the curving handle, the mottled design, or the reflections of the windows on the side of the cup. In short, labels can limit the amount of material accessible to our imagination" (pg. 55).

The challenge this week for BYP52Weeks is to celebrate the mundane. Patterson suggests several photography exercises to help you see, appreciate, and photograph a mundane object.


One of these exercises is to lock yourself in a single room and commit to spending 20 minutes taking 10 different photographs in that room. The goal is both to spend significant time observing and thinking about the room and the scene, as well as to push yourself to try different ways of representing that space or that object. The photograph above is one I took after spending 20 minutes in my cramped bathroom. I got very interested in reflections and bokeh in this toothbrush holder.

Another exercise is to take an individual mundane object and take at least 20 different photographs of that object over the course of 24 hours. See how your thoughts about that object and its photographic potential change over the day. See how it looks and responds differently to different lighting situations.

    Don't forget to have fun! My photograph above of a screwdriver was inspired by a weekly mundane object challenge, as well as my love of puns and double meanings.

    Push yourself to try something different in your photography this week. Grab a random object from your junk drawer or ask a friend to make a random suggestion. See what you can create that is creative and unexpected from your mundane beginnings.

    Want to learn more about Freeman Patterson or Photography and the Art of Seeing? You can read the rest of the August Photography Book Club posts here: overviewweek 1reflection on week 1week 2 (contains the mundane exercises), week 3, and week 4.


    Boost Your Photography: Learn Your DSLR is now available from Amazon. Get the most out of your camera with practical advice about the technical and creative aspects of DSLR photography that will have you taking beautiful pictures right away.

    Thursday, March 5, 2015

    Avoid Memory Card Disaster: proper handling and care of memory cards


    It is a fear that lurks in the heart of every photographer - what if something should happen to my image files? We take every precaution. We make duplicate copies. We back up our computers. But yet we have all heard stories of failure. This post will walk you through how best to take care of your memory cards to prevent disaster, and second post in this series will explore common options to recover your files if disaster strikes. Though I hope you will never need the advice, it will be here if you do.

    Proper Care of Memory Cards

    Store Memory Cards Safely | Boost Your Photography

    We all know the basics. Keep your memory cards safe and away from common hazards like dirt, water, and cold. Buy a simple memory card holder to store your cards when they are not being used in your camera. A portable weather-tight or water-proof case can be had for less than ten dollars and can hold multiple cards. Shop for memory card holders on Amazon.

    Rotate your memory cards. Just like shoes, memory cards can wear down and wear out. How and when that will happen is not predictable, but you should be prepared. Many photographers recommend relying on a collection of smaller memory cards (say 8 GB or 16 GB), rather than storing all your photographs from one day or one trip on a single 32 GB or 64 GB card. If you do not regularly fill your cards to capacity, still think about switching to different cards, say once a month, to prevent any one card from constant wear.

    Format your memory card in camera. Every time. Especially if you are putting a card into a different camera or are using a new card. Formatting your card helps reset it internally and keeps it functioning at its best.


    I know there are those among us who dread the thought of deleting images from their card, but a memory card is a far less reliable means of long-term storage than your computer, the cloud, and multiple, redundant flash drives. (Not sure about adequate protection for your digital files once they are off your card and on your camera? Please read Top Tips for Camera Memory and Storage for important advice and suggestions.)

    Get in the habit of reformatting your memory card before any big shoots. Once you know that your photos are downloaded to your computer and backed up at least twice, you should feel confident in reformatting and deleting them from your memory card.

    Watch your battery levels. When your battery level indicator gets low on your camera, you should be prepared to switch to a new battery. If your battery dies in the middle of when your camera is trying to write a file to the memory card, it can cause the entire card to become corrupt, and you may be unable to retrieve any images from the card. Always be prepared with a backup battery, and you can feel confident replacing a low battery without having to discharge it completely.

    Be careful when downloading from your card to your computer.  There are many ways to download your photographs to your computer - you can plug your camera into your computer, you can plug your memory card directly into your computer, or you can plug your memory card into a card reader. Whichever method you choose, take extra care when handling your memory card. Try not to touch the electrical contacts on the ends of your card. Avoid magnets and static electricity as well. As soon as you are done downloading, put your card either safely back in the camera or in its carrying case.

    Next Steps

    But, no matter the precautions, sometimes disaster strikes. The next post in this series will cover what to do if memory card problems arise.


    Boost Your Photography: Learn Your DSLR is now available from Amazon. Get the most out of your camera with practical advice about the technical and creative aspects of DSLR photography that will have you taking beautiful pictures right away.